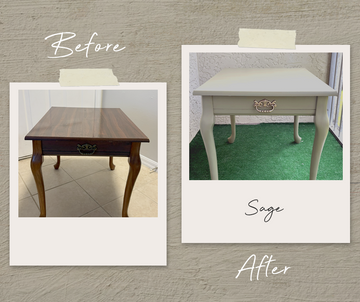
If you've ever looked at an old wood cabinet and thought about giving it a fresh, modern look, then this guide is for you. Today, we’ll walk through updating an oversized wood cabinet using Beyond Paint, focusing on the beautiful Pebble color. Whether you're a seasoned DIYer or a beginner, this tutorial will show how easy it is to transform your furniture without the need for sanding, stripping, or priming. So, let’s dive in!
Step 1: Prep Your Surface
Before reaching for the paint, the most crucial step is to ensure your cabinet is thoroughly cleaned. A clean surface is essential for good paint adhesion, ensuring your project stands the test of time. To start, use a cleaning solution like Simple Green, Zep Degreaser, or a vinegar-water mix. These options will effectively remove any dirt, grease, or grime from your cabinet, providing a smooth canvas for your Beyond Paint application.
After cleaning, remove all the hardware from the cabinet. It's always a good idea to go over the surface one more time with a clean cloth to catch any missed spots. This attention to detail will pay off when it's time to apply your first coat of paint.
Step 2: Gather Your Tools
For this project, you'll need a few essential tools: a 3/8-inch microfiber roller, a paint tray, and a 2-inch brush for detailed work. Beyond Paint offers a toolkit that includes all these items, making your painting process smooth and hassle-free. The microfiber roller is particularly handy for achieving a smooth, even finish, which is exactly what we're aiming for with this cabinet makeover.
Step 3: Shake, Shake, Shake!
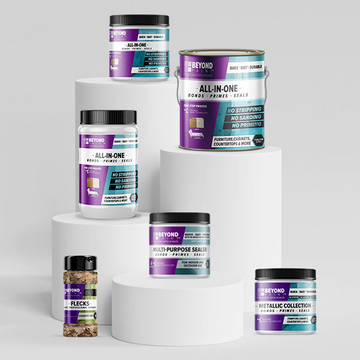
Next up, it’s time to prep your paint. Grab your pint of Beyond Paint in the color Pebble and give it a good shake. Pebble is a warm, medium gray that strikes the perfect balance between neutral and eye-catching. This versatile shade blends seamlessly with a variety of decors and adds a sophisticated touch to any room.
Step 4: Start Painting
Now comes the fun part—painting! Using your microfiber roller, apply a generous coat of Beyond Paint to the cabinet. You’ll quickly notice how well the paint covers the wood, even if the cabinet is a dark or orange-toned wood. The beauty of Beyond Paint is that it’s designed for ease of use; just roll it on and watch your cabinet transform before your eyes.
One of the best things about Beyond Paint is that it requires no sanding, stripping, or priming beforehand. This means you can dive right into your project, saving time and energy while still achieving a professional finish.
Step 5: Wait for It to Dry
Patience is key here! Allow the first coat of paint to dry for two to four hours. While you wait, you can turn your attention to the hardware. In this project, the hardware was cleaned and then spray-painted matte black to complement the matte finish of Beyond Paint. A little spray paint can go a long way in enhancing the overall look of your updated cabinet.
Step 6: Apply the Second Coat
Once your first coat is dry, it’s time to apply the second coat. This will ensure that your cabinet has an even, durable finish that can withstand daily use. Don’t forget to paint the doors of the cabinet as well, giving them the same attention to detail as the main structure. After applying the second coat to both the cabinet and the doors, let everything dry for another two to four hours.
Step 7: Reassemble and Admire
Now that everything is dry, it’s time to reattach the hardware. Take a moment to admire how the matte black hardware contrasts beautifully with the Pebble-colored cabinet. This simple yet effective update breathes new life into a cherished piece of furniture, allowing it to fit perfectly into modern decor while preserving its original charm.
Final Thoughts
And there you have it—a stunning transformation completed in just one day using Beyond Paint. With no need for sanding, stripping, or priming, this project was not only quick but also incredibly satisfying. Pebble’s warm gray tone has truly revitalized this cabinet, turning it from a dated piece into a stylish statement that enhances any room.
Whether you’re updating a hand-me-down or just want to refresh your space, Beyond Paint makes it easy to achieve professional results with minimal effort. A pint of Pebble was all it took to cover this large cabinet, and there’s still plenty left for future projects. In fact, a pint can easily cover two to four nightstands, depending on their size.
So why wait? Grab your Beyond Paint, a trusty microfiber roller, and start your next DIY project today. Whether you're shopping online or at your local Lowe's, Beyond Paint has everything you need to bring your furniture back to life. Happy painting!
