
Are your countertops looking worn out, outdated, or just in need of a refresh? Instead of replacing them with expensive new materials, you can easily transform them using Beyond Paint, a versatile all-in-one refinishing paint that comes with a built-in bonder, primer, and sealer. This simple yet effective product allows you to give your countertops a whole new look without breaking the bank. Here’s how you can do it step-by-step.
Why Choose Beyond Paint?
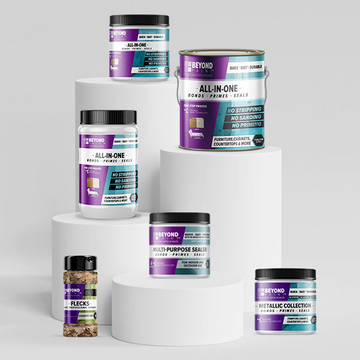
Beyond Paint is a game-changer because it streamlines the entire process of refinishing your countertops. No need to purchase a separate primer, bonder, or sealer—Beyond Paint has everything you need in one formula. It’s also incredibly durable, making it perfect for high-use surfaces like kitchen and bathroom countertops. Let’s dive into the process of transforming your countertops using Beyond Paint.
● Clean and Degrease the Surface
Before you begin any refinishing work, it’s crucial to start with a clean, grease-free surface. First, remove any debris, grease, or dirt by wiping down your countertop with an industrial grade degreaser. This ensures the paint will adhere properly. Pro tip: Make sure to thoroughly dry your countertop before proceeding with painting!
● Apply the First Coat of Beyond Paint
Once the surface is clean and dry, it’s time to start the painting process. Shake your Beyond Paint container well to ensure an even application. Using a 3/8th inch microfiber roller, apply the first coat of Beyond Paint. Be sure to apply it evenly, covering the entire surface. We’ve gone with our color Licorice today which is a true matte black that is perfect for a dramatic contrast or a touch of edgy elegance.
● Let the First Coat Dry
After applying the first coat, it’s time to give it some time to dry. Beyond Paint typically requires about 2 to 4 hours to dry completely, depending on humidity and temperature. During this time, it’s important to resist the urge to touch the surface to avoid smudging or damaging the finish.
● Apply the Second Coat of Paint
Once the first coat is dry, it’s time to apply the second coat of Beyond Paint. This second layer helps to ensure a smooth, flawless finish. Be sure to apply it evenly just like you did with the first coat. Beyond Paint offers exceptional coverage, so the second coat should bring out the richness of the color while giving your countertop a solid, durable finish.
● Add Countertop Flecks
Immediately after applying the second coat, it's time to add your desired countertop flecks. The name of the flecks we’re using for this project is Autumn . These flecks provide texture and visual interest, allowing you to create a completely custom look for your countertops. Simply sprinkle the flecks onto the freshly painted surface and let them settle into the paint. This step is important for adding depth and character to
the new countertop finish. **If the countertop goes up onto the wall, you will need to take some flecks in your hand and do a throwing technique. To get in between the creases, we recommend using any kind of card and pushing down the flecks into the crease.**
● Let the Paint Dry
After applying the countertop flecks, let the paint dry for a minimum of 8 hours up to overnight. This drying period is crucial to ensuring that the flecks are properly set in place and the paint has fully adhered to the surface.
● Sand the Surface
Once you return after 8 hours or the next day, it's time to address any imperfections. Some flecks may not have adhered flat to the countertop during application, and sanding will help smooth out those areas. Take 320-grit sandpaper and gently sand the surface to smooth any uneven spots, ensuring an ultra-sleek and professional finish. Be sure to wipe off any dust or particles left behind from sanding with a clean, dry cloth.
● Apply the Multi-Purpose Sealer
To finish your countertop transformation, it's time to seal the paint for added protection and shine. Beyond Paint’s Multi-Purpose Sealer is the perfect solution to keep your countertop looking fresh and durable. Apply 2 to 3 very thin coats of the sealer to the entire surface, allowing each coat to dry before applying the next. Be sure to wring out any excess sealer from the roller before applying it to the countertop. This extra layer of protection helps to prevent scratches, stains, and wear while enhancing the overall look of the finish with a high satin sheen.
● Enjoy Your New Countertops!
Once the sealer has fully dried, your countertops are ready for use! You’ve successfully transformed your old, worn-out surfaces into something fresh, functional, and beautiful.
Refinishing your countertops with Beyond Paint is a rewarding and affordable DIY project. By following these simple steps, you can achieve professional results without the high cost of replacing your countertops. Whether you’re looking to update your kitchen, bathroom, or any other space, Beyond Paint offers the perfect solution to revitalize your countertops. Shop Beyond Paint today in the paint aisle at your local Lowe’s!


