
Are you tired of staring at an outdated bathroom vanity? A full renovation can be expensive and time-consuming, but with Beyond Paint, you can achieve a fresh, modern look in just a few easy steps—no sanding, stripping, or priming required!
Today, we’re taking on a bathroom vanity makeover using Beyond Paint’s Deep Blue for the cabinets and their Bright White & Smoked Gray Countertop Makeover Kit to transform the space. With just a few coats of paint, a microfiber roller, and the right finishing touches, this outdated vanity is about to get a major refresh. Let’s dive in!
Step 1: Prepping for Perfection
Before we start painting, it’s crucial to prep the surface properly. While Beyond Paint eliminates the need for sanding or priming, you still want to make sure the vanity is clean. Using a degreaser like Simple Green or a vinegar-water mix will remove any oils, dirt, or buildup that could interfere with adhesion. Once the surface is completely dry, we’re ready to roll—literally!
Step 2: Painting the Vanity with Deep Blue
The star of this makeover is Deep Blue—a rich, cool-toned navy that’s bold enough to make a statement but classic enough to stay timeless. Applying Beyond Paint is a breeze with a 3/8-inch microfiber roller. This tool ensures smooth, even coverage without streaks or brush marks.
- First coat: Apply an even layer of paint with your microfiber roller, making sure to reach all the edges. If needed, use a stippling brush for any tricky areas. Let the first coat dry for 2-4 hours before moving on.
- Second coat: Once dry, apply your second coat of Beyond Paint. The beauty of this formula is that only two coats are needed for full coverage—saving you time and effort!
Since bathroom vanities endure daily wear and tear, we’re adding an extra layer of durability by sealing the paint with Beyond Paint’s Multi-Purpose Sealer. After letting the paint cure for 3-5 days, apply 2-3 very thin coats of sealer, allowing 2-4 hours of drying time between each layer. This step is crucial to keeping your vanity looking flawless for years to come!
Step 3: Countertop Transformation with Bright White & Smoked Gray
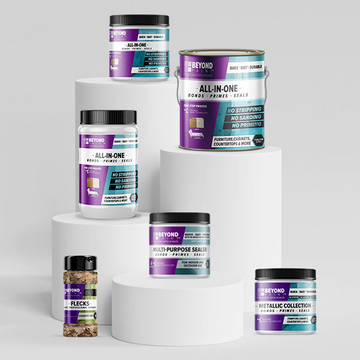
Now that our cabinets are beautifully painted, it’s time to take on the countertop. We’re using the Beyond Paint Countertop Makeover Kit, which includes a pint of paint, sealer, a toolkit, and countertop flecks for added texture and dimension.
Here’s how we’re transforming this countertop:
1. Clean the surface thoroughly with a degreaser like Simple Green or Zep Degreaser to remove any residue. Let it dry completely.
2. Apply the first coat of Bright White using a 3/8-inch microfiber roller, ensuring smooth, even coverage. Let it dry for 2-4 hours before applying the next layer.
3. Second coat time! Another even layer of paint will provide a solid base for the flecks.
4. Add the Countertop Flecks in Smoked Gray for a natural stone-inspired finish. Sprinkle them onto the wet paint, ensuring even distribution.
5. Seal the surface with the included sealer, applying 2-3 thin coats to protect your new countertop from daily wear.
Step 4: The Big Reveal!
With the Beyond Paint Deep Blue vanity and the Bright White & Smoked Gray countertop, this bathroom has gone from drab to downright stunning! The best part? This entire makeover was done without the hassle of priming, stripping, or sanding.
If you’re looking to give your bathroom vanity a fresh new look without breaking the bank, Beyond Paint is the perfect solution. With just paint, a microfiber roller, and a little creativity, you can achieve a high-end transformation in no time.
Ready to revamp your space? Check out Beyond Paint’s full collection, and start your next DIY project today!


